Tuesday, July 10, 2012

Tune in Tuesday: Lykke Li's Wounded Rhymes

image via


  • Genre: Alternative, experimental, indie pop
  • Released: February 2010
  • First listen: August 2011
  • Favorite track: "Jerome"
  • Found out through: flicking channels, She did mtv's Unplugged
  • Listen to this when you're: enjoying a rainy day
Lykke Li's sound is exotic and mysterious, yet soulful. It's almost like she's lurring you into her world, the beat of the drums driving you further and further in. It's hard to pinpoint the vibe of this album because each track evokes it's own emotion. For example, "Get Some" awakens an inner vixen, while "I Know Places"is a small tear drop rolling on the side of her cheek.  This Swedish artist is truly a musician who is dedicated to her work.


TTFN<3

Saturday, July 7, 2012

DIY: Kitty Car Freshener


A few months ago I got my first car (with a little help from mom n' pops; thanks!). I got those little packs of trees to keep my car fresh, but they only last a week or so each....And I'm not too fond of having to keep buying more. So here's my little kitty for my car!

everything you could possibly need for this project

Materials


  • Felt
  • ribbon
  • liquid stitch/fabric glue
  • essential oil
  • scissors
  • chalk
  • pins

my choice of scents

You can also use...


  • any scrap fabric (if it's thin, use cardboard in the middle to hold it's shape)
  • perfume
  • cologne
  • body spray
  • fabreeze
  • needle and thread
  • glue gun
  • elastic (instead of ribbon)

On to the kitty cat!

For the kitty, I first layered two pieces of felt. I kept them together until all of my pieces were cut out. I traced a 4'' diameter circle using a ribbon spool. Then I added the ears. Pinned it together, and snip!


For the face, I cut out two circles for eyes, two triangles for the inside of the ears, a smaller triangle for the nose, six skinny rectangles for whiskers, and a "3" shape for the mouth. All the pieces were still doubled, so I had a set in pink and a set in blue.


Using the liquid stitch, I glued the two kitty head pieces together, and then glued the face on using the opposite color set. Once the glue is dry, I cut a slit big enough to string the ribbon through (18" to 24" will do) After that, I used roughly 20 drops of essential oil on each side. That's it! ready to hang!


I named my car Freddie :3


These photos were taken right after I dowsed it in essential oil, so you can still see the drops. They disappeared after a couple of hours, but the scent was just as strong. Now every time I open my door, I get a whiff of tangerine and lychee, *yummmmm* It's been about a week and a half so far and the scent has yet to fade. I'll report back when I have to add some more essential oil.

The best part about it is you can use scraps and don't have to buy a thing! Even if you do want to splurge, it'd run you about $3 for materials, and anywhere from $5 to $15 for the essential oil. Also, I love that this is reusable!

I think I might make a Green Lantern logo for my brother, and maybe Jake for myself. Let me know if you try this out! I'd love to see :D


***UPDATE***

Today, August 17th I finally had to re-saturate my kitty. That's a total of 52 days of tangerine goodness in my car! The freshener shows no signs of wear or melting. :)


TTFN<3

Tuesday, July 3, 2012

OOTD: Colonial Cook Out

This outfit was too cute NOT to share! I love this dress! Although I'll have to admit somewhere between when I bought it a month ago and now, my boobs got bigger. Thus, the dreaded button gap >_<; but a nice cami can solve that issue. This dress has lovely lace details that remind me a bit of the colonial times; perfect for the holiday! I think this outfit could work for non-patriotic days, too.

D E T A I L S :

  • dress - H&M
  • cami - ?
  • belt - Goodwill
  • leggings - Target
  • shoes - Payless
  • necklace - Kohl's
  • earrings - Claire's
  • bracelet - Gift from Zack when we went to Hawai'i
M A K E U P :
  • Revlon foundation
  • Naked palette - virgin, buck
  • Sephora liquid eyeliner
  • Revlon lipstick - abstract orange (026)


I wore contacts so I could wear sunglasses (also I haven't worn them in over a year :O) The leggings certainly helped prevent the bug bites, even though I got a couple around my ankles. I wore this outfit to church and then to a 4th of July cook out this past sunday. I have one more today and then another one tomorrow! Today is my city's fireworks, so I'm looking forward to that.

Happy 4th!
TTFN<3

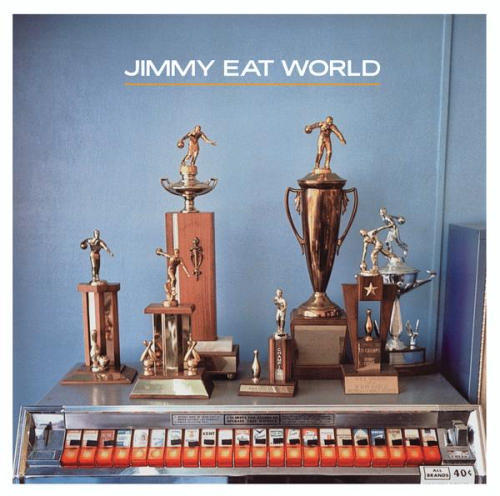
Tune in Tuesday: Bleed American by Jimmy Eat World

image via

  • Genre: Alternative rock, pop punk, emo
  • Released: July 2001
  • First Listen: back in my punk days (2003ish)
  • Favorite track: "The Middle"
  • Found out through: No idea!
  • Listen to this when you're: driving along the beach at night
I found it fitting since Independence Day is tomorrow that I pick something American...I mean it was this or an album by All-American Rejects.... Niether of which are exactly patriotic but America's in the name so...ANYWAYS....

This brings me way back to when I was in my rebellious teens; I listened to nothing but music of the punk persuasion. My musical taste has definitely broaden since then but certain bands still hold a special place in my library. This is certainly one of them! I would (and still) blast tracks like "Sweetness," "A Praise Chorus," and especially "The Middle." I love the message of "The Middle" because it's pretty much my outlook on life. It just takes some time, little girl, you're in the middle of the ride. Everything everything will be just fine, everything everything will be alright alright...


Sunday, July 1, 2012

Independence Day Nails! You're a Grand Old Flag


Here's a little secret: I stink at painting my nails, but I still love to! I'm messy, accidental, and I always manage to smudge them before they dry (my sister can attest to this). Nevertheless, I made a super easy 4th of July manicure! GO MURRICA!

base - red - white crackle - blue - glitter - more glitter - top coat
All the polishes from start to finish; except I didn't realize the red was a terrible crackle; I replaced it with a brick red (sally hansen). The OPI blueish glitter had bigger silver speckles that served as stars!


  1. Base coats are my best friend; I hate stained nails. womps!
  2. Two coats of red.
  3. One thin coat of white crackle. I deliberately left a couple of stripes just to make sure people kinda get it.
  4. Paint the blue square in the lefthand corner of the nail; I took up about 1/4 of my nail bed.
  5. GLITTERRR! I did one coat of the blue one first and made sure to get a couple of bigger silver pieces in each of the blue squares. Then I did a general glitter, still only over the blue squares.
  6. Top coat!
That's it! super easy. I like that this is kinda edgy and fun. It also goes along with the whole "grand old flag" HAHA get it? 'cause it's all cracked and stuff? no? ok...


hope you like it!
TTFN<3


Related Posts Plugin for WordPress, Blogger...